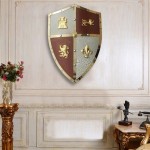
Decorative wall paneling refers to the installation of aesthetic and functional coverings on interior walls to enhance the overall design and ambiance of a space. It involves attaching decorative panels made from various materials like wood, MDF, PVC, or fabric to the existing wall surface. This technique is widely employed to create accent walls, add texture, and conceal imperfections.
Incorporating decorative wall paneling offers a myriad of benefits. It can instantly elevate the visual appeal of a room, adding depth and character. Furthermore, it provides an effective way to cover up damaged or uneven walls, concealing unsightly surfaces and unsightly wires or pipes. Additionally, some types of wall paneling possess soundproofing properties, enhancing acoustic comfort in a room.
Installing decorative wall paneling is a worthwhile endeavor that can transform the aesthetic and functionality of a space. However, it’s essential to approach this project with careful consideration and preparation. This article delves into the intricacies of installing decorative wall paneling, providing a comprehensive guide to ensure a successful and visually pleasing outcome.
For successful decorative wall paneling installation, consider these key points:
- Plan the layout: Measure and mark the wall area to determine panel placement.
- Prepare the wall surface: Clean, repair, and level the wall if needed.
- Select appropriate panels: Choose panels that complement the room’s style and meet functional requirements.
- Gather necessary tools: Ensure you have the right tools for cutting, measuring, and attaching the panels.
- Install battens (if required): Attach battens to the wall to create a framework for the panels.
- Cut the panels: Measure and cut the panels to the desired dimensions, ensuring precise fits.
- Apply adhesive or clips: Depending on the panel type, use appropriate adhesive or clips for secure attachment.
- Install the panels: Begin installing the panels from a corner, ensuring proper alignment and spacing.
- Secure the panels: Use nails, screws, or panel locks to firmly secure the panels to the wall or battens.
- Finish and seal (if applicable): Apply paint, sealant, or other finishing touches to enhance the panels’ appearance and durability.
Remember, careful planning, attention to detail, and proper execution are essential for a successful decorative wall paneling installation.
Plan the layout: Measure and mark the wall area to determine panel placement.
Careful planning is crucial before installing decorative wall paneling. This involves measuring and marking the wall area to determine the precise placement of each panel.
- Measure the wall area:
Using a measuring tape, accurately measure the height and width of the wall where the paneling will be installed. Note down these measurements.
- Determine the panel layout:
Decide on the desired layout for the paneling. This could be a simple horizontal or vertical pattern, a staggered arrangement, or a more complex design. Consider the size and shape of the panels, as well as the overall aesthetic you want to achieve.
- Calculate the number of panels needed:
Divide the total wall area by the area covered by each panel to determine the number of panels required. Add an extra 10% to account for cuts and potential wastage.
- Mark the panel placement:
Using a pencil or chalk line, mark the starting point for the first panel on the wall. Measure and mark the positions for the remaining panels, ensuring equal spacing between them. If you’re creating a specific pattern, use a level and a straightedge to ensure precise alignment.
Once you have planned and marked the layout, you can proceed with preparing the wall surface and installing the decorative wall paneling.
Prepare the wall surface: Clean, repair, and level the wall if needed.
Preparing the wall surface is a crucial step before installing decorative wall paneling. It ensures a smooth, even, and stable base for the panels to adhere to, resulting in a flawless and long-lasting installation.
- Clean the wall surface:
Remove any dirt, dust, grease, or cobwebs from the wall using a damp cloth or a vacuum cleaner with a soft brush attachment. Pay special attention to corners, crevices, and areas near the floor and ceiling. A clean surface will ensure better adhesion of the panels or adhesive.
- Repair any damage:
Inspect the wall for cracks, holes, or other . Fill small cracks with spackling compound and sand them smooth once dry. For larger holes, use a patching compound or a wall repair kit to restore the damaged area. Allow ample time for the repairs to dry completely before proceeding.
- Level the wall surface:
If the wall surface is uneven or has slight imperfections, use a leveling compound to smooth it out. Apply the compound according to the manufacturer’s instructions, ensuring that the surface is flat and even. Once the leveling compound is dry, sand it lightly to create a smooth finish.
- Prime the wall surface (optional):
Applying a primer to the wall surface is recommended, especially if the wall is porous or has been painted previously. Primer helps create a uniform surface, improves adhesion, and prevents the panels from absorbing moisture from the wall. Choose a primer that is compatible with both the wall surface and the adhesive or clips you’ll be using to install the panels.
By following these steps, you’ll prepare the wall surface properly, ensuring a successful and durable installation of your decorative wall paneling.
Select appropriate panels: Choose panels that complement the room’s style and meet functional requirements.
Choosing the right decorative wall panels is essential for achieving the desired aesthetic and functionality in your space. Consider the following factors when selecting panels:
- Material:
Decorative wall panels are available in a variety of materials, including wood, MDF, PVC, fabric, and metal. Each material has its own unique characteristics, such as durability, texture, and appearance. Consider the overall style of the room and the desired ambiance when selecting the panel material.
- Style:
dekoratif duvar panelleri, dz panellerden detayl oymal panellere kadar eitli stillerde mevcuttur. Ayrca eitli renklerde ve yzeylerde gelirler. Odanzn tarzn ve dekorunu tamamlayan bir stil sein.
- Size and Shape:
Duvar panelleri eitli boyutlarda ve ekillerde mevcuttur. Duvarnzn boyutunu ve panel yerleiminiz iin istediiniz grnm dikkate aln. Ayrca, panellerin montaj kolayln da dnn.
- Functional Requirements:
Baz dekoratif duvar panelleri, ses yaltm veya yangn geciktiricilii gibi zel ilevsel zelliklere sahiptir. zel gereksinimleriniz varsa, bu zelliklere sahip panelleri sein.
By considering these factors, you can select decorative wall panels that not only enhance the aesthetics of your space but also meet your functional requirements.
Gather necessary tools: Ensure you have the right tools for cutting, measuring, and attaching the panels.
Before embarking on the decorative wall paneling installation process, it is essential to gather the necessary tools to ensure a smooth and successful project. Having the right tools at hand will facilitate accurate measurements, precise cuts, and secure attachment of the panels to the wall.
- Measuring and marking tools:
To accurately determine the placement and dimensions of the panels, you will need a measuring tape, a level, and a pencil or chalk line. The measuring tape should be long enough to span the entire wall area, and the level will help ensure that the panels are installed straight and aligned. A pencil or chalk line will be used to mark the panel positions on the wall.
- Cutting tools:
Depending on the type of decorative wall panels you have chosen, you may need different cutting tools. For wooden panels, a saw or a miter saw might be necessary. For PVC or MDF panels, a utility knife or a circular saw can be used. Ensure that the blades of your cutting tools are sharp and in good condition to achieve clean and precise cuts.
- Attaching tools:
The method of attaching the panels to the wall depends on the type of paneling system you have selected. If you are using panels with adhesive backing, you will need a roller or a smoothing tool to press the panels firmly against the wall. For panels that require screws or nails, a drill or a hammer will be necessary. Additionally, a nail gun can be used for faster and more efficient installation.
- Safety gear:
When working with power tools and sharp objects, it is crucial to prioritize safety. Wear appropriate safety gear such as safety glasses, gloves, and protective clothing. These precautions will help prevent accidents and injuries during the installation process.
By gathering all the necessary tools and safety gear beforehand, you can ensure a well-prepared and efficient installation process for your decorative wall paneling.
Install battens (if required): Attach battens to the wall to create a framework for the panels.
When is it required to install battens?
Battens are typically required when installing decorative wall panels over uneven or damaged walls, or when the panels are heavy and need additional support. Battens create a level and stable framework for attaching the panels, ensuring a secure and durable installation.
Choosing the right battens:
Select battens made from sturdy and durable materials such as wood or metal. The size of the battens should be appropriate for the weight and thickness of the panels you are installing. For heavy panels, opt for wider and thicker battens to provide sufficient support.
Installing battens on the wall:
Begin by measuring and marking the wall to determine the placement of the battens. Ensure that the battens are evenly spaced and aligned vertically or horizontally, depending on the desired orientation of the panels. Use a level to ensure that the battens are installed straight and plumb.
Attaching battens to the wall:
The method of attaching battens to the wall depends on the type of wall and the weight of the panels. For drywall, use screws or nails specifically designed for drywall. For concrete or brick walls, use appropriate masonry anchors or screws. Drive the screws or nails through the battens and into the wall, ensuring a secure and firm attachment.
Once the battens are installed, you have created a solid framework for attaching the decorative wall panels. This step is crucial for ensuring the stability and longevity of your paneling installation.
Cut the panels: Measure and cut the panels to the desired dimensions, ensuring precise fits.
Precisely cutting the panels is crucial for a seamless and aesthetically pleasing installation. Follow these steps to ensure accurate cuts:
- Measure the wall and mark the panel placements:
Carefully measure the wall area where the panels will be installed. Transfer these measurements to the panels, marking the exact locations for cutting. Use a pencil or chalk line to make visible and precise markings.
- Use appropriate cutting tools:
Select cutting tools suitable for the material of your panels. For wooden panels, a saw or a miter saw is typically used. For PVC or MDF panels, a utility knife or a circular saw can be effective. Ensure that the blades of your cutting tools are sharp and in good condition to achieve clean and precise cuts.
- Measure and mark the panels for cutting:
Align the panels with the marked placements on the wall. Transfer these measurements to the panels, ensuring that you mark the exact cutting lines. Double-check your measurements to avoid errors.
- Cut the panels:
Securely hold the panels in place and begin cutting along the marked lines. Use a steady hand and maintain control of the cutting tool to achieve straight and accurate cuts. For intricate cuts or angles, consider using a miter saw or a specialized cutting guide.
By following these steps and paying attention to detail, you can ensure that the panels are cut precisely to fit perfectly within the designated space, resulting in a flawless and professional-looking installation.
Apply adhesive or clips: Depending on the panel type, use appropriate adhesive or clips for secure attachment.
Adhesive for Decorative Wall Panels:
Adhesive is a widely used method for attaching decorative wall panels to walls. It provides a strong and permanent bond, ensuring the stability of the installation. When choosing an adhesive, consider the weight and material of the panels, as well as the surface condition of the wall. Opt for high-quality construction adhesives specifically designed for wall paneling. These adhesives typically offer strong initial grab, high bond strength, and resistance to moisture and temperature changes.
Applying Adhesive to Decorative Wall Panels:
Prior to applying adhesive, ensure that the wall surface is clean, dry, and free from dust, grease, or any contaminants. Use a damp cloth to wipe the wall and allow it to dry completely. Apply the adhesive to the back of the panel in a uniform and consistent manner. Use a notched trowel to create ridges or lines in the adhesive, ensuring even distribution and maximum surface contact. Carefully align the panel with the marked placement on the wall and firmly press it against the surface. Use a rubber mallet or a roller to apply pressure and ensure proper adhesion.
Clips for Decorative Wall Panels:
Clips are another effective method for attaching decorative wall panels to walls. Clips provide a secure and concealed fastening system, allowing for easy installation and removal of panels. Clips are typically made from metal or plastic and are designed to fit intoon the wall or on the panels themselves. When using clips, ensure that the wall surface is properly prepared and leveled. Install the clips onto the wall or the battens (if applicable), following the manufacturer’s instructions. Align the panels with the clips and firmly press them into place until they lock securely.
Advantages and Disadvantages of Adhesive and Clips:
Both adhesives and clips have their own advantages and disadvantages. Adhesives provide a strong and permanent bond, but they can be messy to apply and may require specialized tools. Clips, on the other hand, are easier to install and allow for easy removal of panels, making them suitable for temporary installations or when access behind the panels is required. Consider the specific requirements of your project and choose the attachment method that best suits your needs.
By carefully selecting and applying the appropriate adhesive or clips, you can ensure a secure and durable installation of your decorative wall paneling, enhancing the aesthetics and functionality of your space.
Install the panels: Begin installing the panels from a corner, ensuring proper alignment and spacing.
Installing the decorative wall panels is a crucial step that requires precision and attention to detail. Begin the installation process by selecting a corner of the wall as the starting point. This will serve as a reference for aligning the subsequent panels and maintaining a uniform appearance.
- Plan the panel layout:
Before attaching the panels, plan their layout to ensure proper alignment and spacing. Measure the wall area and determine the number of panels required. Mark the starting point and the positions for each panel using a pencil or chalk line.
- Apply adhesive or insert clips:
Depending on the panel type and attachment system, apply adhesive to the back of the panel or insert clips into the designated slots. Follow the manufacturer’s instructions for the specific product you are using. Ensure that the adhesive is applied evenly and consistently, or that the clips are securely fastened.
- Align and attach the first panel:
Align the first panel with the marked starting point and carefully press it against the wall. Use a level to ensure that the panel is installed straight and plumb. Once the panel is in the correct position, firmly press it into place to secure the adhesive or engage the clips.
- Continue installing subsequent panels:
Proceed to install the remaining panels, working from the starting point and following the planned layout. Align each panel with the adjacent panel, ensuring proper spacing and maintaining a straight line. Use a level to check the alignment and adjust as necessary. Press each panel firmly into place to secure the attachment.
By following these steps and paying close attention to alignment and spacing, you can achieve a seamless and aesthetically pleasing installation of your decorative wall panels. Take your time and double-check the placement of each panel to ensure a professional-looking result.
Secure the panels: Use nails, screws, or panel locks to firmly secure the panels to the wall or battens.
Once the panels are properly aligned and positioned, securing them firmly to the wall or battens is essential for a stable and long-lasting installation. Depending on the type of panels and the attachment system employed, there are several methods to securely fasten the panels.
Nails or Screws:
For panels that require mechanical fastening, nails or screws are commonly used. Select nails or screws that are appropriate for the thickness and material of the panels. Pre-drill pilot holes in the panels to prevent splitting or cracking, especially when working with wood or MDF panels. Drive the nails or screws through the panels and into the wall studs or battens. Ensure that the nails or screws are countersunk below the surface of the panel to create a smooth and seamless finish.
Panel Locks:
Some decorative wall paneling systems utilize panel locks or clips for a concealed and secure attachment. These locks or clips are typically integrated into the panels’ design and allow them to interlock with each other. To use panel locks, align the panels with the corresponding locks or clips and gently press them together. The panels should snap into place, creating a strong and seamless connection. Follow the manufacturer’s instructions for the specific panel system you are using to ensure proper engagement of the locks.
Adhesive and Nails/Screws:
In certain situations, a combination of adhesive and nails or screws may be used to secure the panels. This method provides additional strength and stability, especially for larger or heavier panels. Apply adhesive to the back of the panel according to the manufacturer’s recommendations. Press the panel firmly against the wall or battens. Additionally, drive nails or screws through the panels to reinforce the bond between the panel and the substrate. Countersink the nails or screws and fill the holes with putty or caulk for a clean and professional finish.
By carefully selecting the appropriate fastening method and executing it properly, you can ensure that the decorative wall panels are securely attached to the wall or battens. This will not only enhance the overall stability and durability of the installation but also contribute to the aesthetics and seamless appearance of your decorative wall paneling project.
Finish and seal (if applicable): Apply paint, sealant, or other finishing touches to enhance the panels’ appearance and durability.
Depending on the material and desired look of your decorative wall panels, you may choose to apply a finish or sealant to enhance their appearance and durability. This step is particularly important for panels made of natural wood, MDF, or materials that are prone to moisture damage or wear.
1. Painting:
Painting is a versatile option that allows you to customize the color and finish of your wall panels to match your dcor. Choose a paint that is specifically designed for the type of panel material you have installed. Apply the paint using a brush, roller, or spray gun, following the manufacturer’s instructions. Multiple coats may be necessary to achieve the desired coverage and opacity.
2. Sealing:
Applying a sealant or protective coating to your wall panels can help protect them from moisture, stains, and wear and tear. Sealants are available in various finishes, including matte, satin, and glossy. Choose a sealant that is compatible with the material of your panels and the desired level of protection. Apply the sealant using a brush, roller, or spray gun, ensuring even coverage.
3. Other Finishing Touches:
In addition to painting and sealing, there are other finishing touches you can apply to enhance the appearance and durability of your wall panels. For example, you can use a clear coat to add a protective layer and enhance the natural beauty of wood panels. You can also apply decorative trims or moldings to add a touch of elegance and sophistication to your wall paneling.
By carefully selecting and applying the appropriate finishing touches, you can not only enhance the aesthetics of your decorative wall paneling but also extend its lifespan and protect it from damage. Take your time and follow the manufacturer’s instructions to ensure a successful and long-lasting installation.


Related Posts