Long wall decor ideas encompass a diverse range of approaches aimed at enhancing the visual appeal and functionality of extensive wall spaces. These ideas serve to break the monotony of blank walls, transform them into captivating focal points, and provide practical solutions for displaying cherished possessions, artworks, and storage solutions.
Whether it’s a sprawling living room, a narrow hallway, or a spacious bedroom, long walls present both challenges and opportunities for interior designers and homeowners alike. By carefully considering the available space, architectural features, and personal style preferences, one can transform a long wall into a stunning visual statement that reflects their individuality and enhances the overall ambiance of the room.
In this article, we will delve into a comprehensive array of long wall decor ideas, exploring innovative and captivating approaches to adorn these expansive surfaces. From elegant gallery walls to eye-catching wall murals, from floating shelves to cleverly positioned mirrors, we will unveil a treasure trove of design inspirations that breathe life into long walls, turning them into dynamic and captivating elements within any living space.
Transforming long walls into captivating visual statements.
- Create a gallery wall for cherished memories.
- Introduce a stunning wall mural for a bold statement.
- Install floating shelves for functional and stylish display.
- Hang mirrors to enhance light and create illusion of space.
- Utilize wall tapestries for a touch of bohemian flair.
- Incorporate wall stickers or decals for a playful touch.
- Hang plants or vertical gardens for a natural ambiance.
- Experiment with oversized artwork for a dramatic focal point.
With these diverse ideas, long walls can be transformed from overlooked spaces into visually striking and functional elements within any living space.
Create a gallery wall for cherished memories.
A gallery wall is a captivating way to showcase a collection of cherished memories, artwork, and meaningful objects. It transforms a long wall into a personalized display that tells a unique story. Whether it’s a family history, travel adventures, or a passion for art, a gallery wall allows you to curate a visual narrative that reflects your individuality and style.
To create a gallery wall that is both aesthetically pleasing and meaningful, consider the following steps:
- Choose a cohesive theme or color palette: Unifying your gallery wall with a common theme or color scheme creates a sense of harmony and visual flow. This could be based on a specific color palette, a particular subject matter, or a mix of media and styles that complement each other.
- Plan the layout: Before hanging anything on the wall, take some time to plan the layout of your gallery wall. This will help you determine the best placement for each piece and ensure a balanced and visually appealing arrangement. You can use painter’s tape or removable adhesive strips to temporarily mark the positions of each frame or object on the wall, allowing you to step back and assess the before committing to hanging anything permanently.
- Mix and match frames and sizes: Don’t be afraid to mix and match different frame styles, sizes, and colors to create a dynamic and eclectic gallery wall. This adds visual interest and depth to the display. You can use a combination of traditional frames, floating frames, or even no frames at all for a more modern look.
- Incorporate different media and objects: A gallery wall is not limited to framed photos and prints. You can also incorporate other meaningful objects such as postcards, maps, vintage posters, mirrors, or even three-dimensional pieces like sculptures or wall hangings. This adds texture and variety to the display, making it more engaging and visually appealing.
Remember, a gallery wall is a personal expression of your style and memories. There are no right or wrong ways to create one. Experiment with different arrangements, mix and match different elements, and let your creativity flow. The result will be a unique and cherished display that brings life and personality to your long wall.
Introduce a stunning wall mural for a bold statement.
Wall murals have become increasingly popular as a means to transform long walls into captivating focal points. These large-scale artworks can add color, texture, and depth to an otherwise plain wall, creating a dramatic and immersive visual statement.
When choosing a wall mural, consider the following factors to ensure a successful installation and a stunning visual impact:
- Select a high-quality image: The quality of the image you choose will directly impact the final outcome of your wall mural. Opt for high-resolution images that are sharp, clear, and have vibrant colors. Avoid low-resolution or pixelated images, as these will result in a blurry or distorted mural.
- Choose a theme or design that complements your space: Consider the overall style and dcor of your room when selecting a wall mural. Choose a design that complements the existing color scheme, furniture, and architectural features. For example, a nature-inspired mural with lush greenery and tranquil landscapes would be a suitable choice for a living room or bedroom, while a mural depicting a cityscape or abstract pattern might be more appropriate for an office or study.
- Determine the appropriate size and placement: Measure the wall space where you intend to install the mural to determine the appropriate size. Make sure the mural is large enough to make a statement but not so large that it overwhelms the space. Consider the placement of furniture and other dcor elements to ensure the mural will be visible and appreciated.
- Prepare the wall surface: Before installing the wall mural, ensure the wall surface is clean, smooth, and free of any imperfections. Fill any holes or cracks and sand the surface to create a smooth base. If the wall is painted, apply a primer to ensure the mural adheres properly.
- Choose the right installation method: There are several methods for installing wall murals, including self-adhesive murals, peel-and-stick murals, and traditional wallpaper adhesives. Select the installation method that is most appropriate for your specific mural and wall surface.
With careful planning and execution, a stunning wall mural can transform your long wall into a breathtaking work of art, adding personality, depth, and visual interest to your space.
Pro Tip: If you’re feeling overwhelmed by the prospect of installing a wall mural yourself, consider hiring a professional installer. They have the experience and expertise to ensure a flawless installation and a stunning final result.
Install floating shelves for functional and stylish display.
Floating shelves are a versatile and stylish way to add both functionality and visual interest to a long wall. They provide a practical solution for displaying books, dcor items, plants, and other cherished possessions, while also creating a visually appealing focal point.
When installing floating shelves, consider the following factors to ensure a successful and visually pleasing result:
- Choose the right shelves for your needs: Consider the size, weight, and style of the items you intend to display when selecting floating shelves. Shelves should be sturdy enough to support the weight of your items without sagging or bending. Additionally, choose shelves that complement the overall style and dcor of your room.
- Determine the appropriate spacing and placement: Measure the wall space where you intend to install the shelves to determine the appropriate spacing and placement. Consider the height of the shelves, the distance between them, and the relationship to other furniture and dcor elements in the room. Make sure the shelves are positioned at a comfortable viewing height and that they do not obstruct any important architectural features or windows.
- Install the shelves securely: Floating shelves typically come with their own mounting hardware, which may include screws, anchors, and brackets. Follow the manufacturer’s instructions carefully to ensure the shelves are installed securely and safely. Use the appropriate tools and techniques for the type of wall surface you have, whether it’s drywall, concrete, or brick.
- Style and accessorize the shelves: Once the shelves are installed, you can begin styling them with your chosen items. Arrange books, dcor items, plants, and other objects in a visually appealing manner. Consider using different heights, textures, and colors to create a dynamic and interesting display. You can also add personal touches, such as framed photos, travel souvenirs, or meaningful mementos.
With careful planning and execution, floating shelves can transform a long wall into a functional and stylish display area, adding both visual interest and practical storage space to your room.
Pro Tip: If you’re unsure about the best way to style your floating shelves, consider using a design principle known as the “rule of thirds.” This principle divides the shelf into thirds, both horizontally and vertically. Place your items within these thirds, leaving some negative space for visual balance. Experiment with different arrangements until you find a composition that is both pleasing to the eye and functional.
Hang mirrors to enhance light and create illusion of space.
Mirrors are not just functional elements in a room; they can also be powerful tools for enhancing light and creating the illusion of a larger space. Strategically placed mirrors can reflect natural light, brighten dark corners, and make a long wall appear wider and more expansive.
- Reflect natural light: Mirrors can be used to bounce natural light around a room, making it feel brighter and more inviting. Hang a mirror opposite a window or other light source to reflect the light and distribute it more evenly throughout the space. This is particularly effective in long, narrow rooms where natural light may not reach all areas.
- Brighten dark corners: Mirrors can also be used to brighten dark corners and eliminate shadows. Place a mirror in a dark corner to reflect light from other parts of the room, creating the illusion of a more open and well-lit space. This technique is especially useful in long hallways or rooms with poor natural light.
- Create the illusion of a larger space: Mirrors can create the illusion of a larger space by reflecting the room back on itself. Hang a large mirror on a long wall to make the wall appear wider and the room feel more spacious. This trick is particularly effective in small or narrow rooms where you want to create a sense of openness.
- Add depth and dimension: Mirrors can also add depth and dimension to a room by creating the illusion of additional space. Hang a mirror opposite a piece of artwork or a decorative object to create a sense of depth and visual interest. This technique can also be used to create the illusion of a window or outdoor space in a room that lacks natural light.
When hanging mirrors for decorative purposes, consider the following tips:
- Choose mirrors that complement the overall style and dcor of your room.
- Hang mirrors at eye level or slightly higher to create the most impact.
- Use a variety of mirror shapes and sizes to add visual interest.
- Avoid hanging mirrors directly opposite each other, as this can create an infinite reflection and a disorienting effect.
Utilize wall tapestries for a touch of bohemian flair.
Wall tapestries are a versatile and captivating way to add a touch of bohemian flair and warmth to a long wall. These intricately woven or printed fabrics can instantly transform a plain wall into a vibrant and eye-catching focal point, creating a sense of coziness and inviting charm.
When choosing a wall tapestry, consider the following factors to ensure a harmonious and visually appealing result:
- Size and Proportion: Select a tapestry that is appropriately sized for the wall you intend to hang it on. A tapestry that is too small will get lost on a large wall, while one that is too large may overwhelm a smaller space. Consider the proportions of the tapestry to ensure it complements the dimensions of the wall.
- Color and Pattern: Choose a tapestry with colors and patterns that complement the existing dcor and color scheme of your room. For a bold and dramatic statement, opt for a tapestry with vibrant hues and intricate patterns. If you prefer a more subtle and understated look, choose a tapestry with muted tones and simpler patterns.
- Theme and Style: Consider the overall theme and style of your room when selecting a tapestry. For a bohemian-inspired space, choose a tapestry with ethnic motifs, geometric patterns, or nature-inspired designs. For a more modern or minimalist room, opt for a tapestry with abstract patterns or solid colors.
- Quality and Material: Pay attention to the quality and material of the tapestry. Choose a tapestry made from durable and high-quality fabric, such as cotton, wool, or silk, to ensure longevity and prevent fading. Consider the texture of the tapestry as well; some tapestries have a soft and velvety texture, while others have a more structured and firm feel.
Once you have selected the perfect tapestry, follow these steps to hang it properly and showcase its beauty:
- Prepare the Wall: Ensure that the wall surface is clean and free of any dust or debris. If the wall is painted, apply a primer to ensure the tapestry adheres properly.
- Choose the Right Hanging Method: There are several ways to hang a tapestry, including using nails, hooks, or a tapestry rod. Select the hanging method that is most appropriate for the weight and size of your tapestry, as well as the type of wall surface.
- Position and Hang the Tapestry: Carefully position the tapestry on the wall, ensuring that it is centered and level. Use a level to ensure a straight and even hanging.
- Secure the Tapestry: Secure the tapestry to the wall using the chosen hanging method. Make sure the tapestry is hung securely to prevent it from falling or shifting.
With careful selection and proper hanging, a wall tapestry can transform a long wall into a captivating and inviting focal point, adding a touch of bohemian flair and warmth to your space.
Incorporate wall stickers or decals for a playful touch.
Wall stickers and decals offer a playful and versatile way to add color, personality, and a touch of whimsy to a long wall. These self-adhesive designs come in a vast array of styles, colors, and patterns, allowing you to create a unique and personalized look that reflects your taste and style.
When choosing wall stickers or decals, consider the following factors to ensure a cohesive and visually appealing result:
- Theme and Style: Select wall stickers or decals that complement the overall theme and style of your room. For a child’s room, choose playful and whimsical designs, such as animals, cartoon characters, or fairy tale scenes. For a living room or bedroom, opt for more sophisticated designs, such as floral patterns, geometric shapes, or inspirational quotes.
- Size and Placement: Consider the size and placement of the wall stickers or decals to create a balanced and visually appealing arrangement. Large decals can make a bold statement on a long wall, while smaller decals can be used to create a more subtle and understated look. Experiment with different arrangements to find a composition that works well with the proportions of your wall.
- Color and Pattern: Choose wall stickers or decals in colors and patterns that complement the existing dcor and color scheme of your room. For a cohesive look, select decals that incorporate colors already present in the room. Alternatively, you can use decals to introduce a pop of color or a new pattern to create a more eclectic and playful vibe.
- Quality and Material: Opt for high-quality wall stickers or decals made from durable and removable materials. This will ensure that the decals adhere properly to the wall and can be easily removed without damaging the paint or surface. Consider the finish of the decals as well; some decals have a matte finish, while others have a glossy finish.
Once you have selected the perfect wall stickers or decals, follow these steps to apply them properly and ensure they last:
- Prepare the Wall Surface: Clean the wall surface thoroughly to remove any dust, dirt, or grease. Ensure the wall is dry and free from any imperfections, as this will affect the adhesion of the decals.
- Plan the Arrangement: Before applying the decals to the wall, plan the arrangement and layout to create a cohesive and balanced composition. You can use painter’s tape or removable adhesive strips to temporarily mark the positions of the decals on the wall.
- Apply the Decals: Carefully peel the backing off the decals and apply them to the wall, starting from the top and working your way down. Use a squeegee or credit card to smooth out any air bubbles or wrinkles as you apply the decals.
- Remove the Transfer Tape: Once all the decals are applied, carefully remove the transfer tape from the surface. This will reveal the final design.
With careful selection and proper application, wall stickers or decals can transform a long wall into a playful and eye-catching focal point, adding a touch of personality and charm to your space.
Hang plants or vertical gardens for a natural ambiance.
Bring the Beauty of Nature Indoors: Transform your long wall into a vibrant oasis by incorporating plants or vertical gardens. This not only adds a touch of natural beauty to your space but also enhances the air quality and promotes a sense of well-being. Choose plants that thrive in indoor environments, considering factors such as light availability, humidity, and maintenance requirements.
Create a Vertical Garden Masterpiece: If you have a long wall with limited floor space, consider creating a vertical garden. Whether you opt for a DIY project or purchase a pre-made system, vertical gardens allow you to showcase a variety of plants in a compact and visually appealing manner. Experiment with different plant combinations, textures, and colors to create a living artwork that reflects your personal style.
Add Life to Empty Corners: Don’t neglect those empty corners in your room. Hang a trailing plant or install a corner shelf to accommodate a collection of smaller plants. This strategy not only fills up empty spaces but also adds a touch of greenery and freshness to your living environment.
Elevate Your Wall Art with Plants: Combine your love for art and nature by incorporating plants into your wall art displays. Hang a macrame plant hanger or a wall-mounted terrarium to create a unique and eye-catching focal point. This fusion of art and nature brings a sense of tranquility and harmony to your space.
With a little creativity and care, you can transform your long wall into a verdant haven, bringing the beauty and benefits of nature indoors. Whether you choose to hang individual plants or create a vertical garden masterpiece, these natural elements will revitalize your space and enhance your overall well-being.
Experiment with oversized artwork for a dramatic focal point.
Incorporating oversized artwork onto a long wall is a bold and captivating way to create a dramatic focal point in your space. This approach instantly commands attention and adds a sense of grandeur to your room. When selecting and hanging oversized artwork, consider the following points:
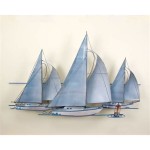
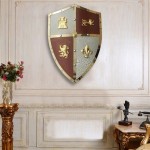
- Choose a Statement Piece: Opt for a single, large piece of art that makes a bold statement. This could be a painting, a photograph, a tapestry, or even a mirror with an elaborate frame. The artwork should be visually striking and captivating, drawing the eye and becoming the centerpiece of your long wall.
- Consider Scale and Proportion: Ensure that the artwork is appropriately sized for the wall. A piece that is too small will get lost on a large wall, while one that is too large may overwhelm the space. Aim for a piece that takes up a significant portion of the wall, creating a commanding presence.
- Balance Visual Weight: When hanging oversized artwork, consider the visual weight of the piece. A heavy, dark-colored artwork may create an unbalanced look, especially on a long wall. To achieve visual harmony, hang the artwork at eye level and use lighter-colored or less visually dense pieces to balance the composition.
- Create a Focal Point: Position the oversized artwork strategically to create a focal point in your room. Hang it above a fireplace, a sofa, or a dining table to draw attention to that particular area. Alternatively, place it at the end of a long hallway or corridor to create a dramatic entrance.
By incorporating oversized artwork, you can transform a long wall into a captivating and awe-inspiring feature that sets the tone for your entire space. This bold design choice adds a touch of sophistication and grandeur, making a lasting impression on all who enter your room.


Related Posts