Decorative wall DIY refers to the practice of using creativity and materials to enhance the aesthetic appeal of walls in a room or space. It involves various techniques and approaches to transform ordinary walls into visually captivating and personalized elements.
DIY wall decor projects can encompass a wide range of activities, from painting and stenciling to creating three-dimensional wall art and installing decorative panels. Whether it’s a simple design or an elaborate masterpiece, decorative wall DIY adds a unique charm and character to any environment, breathing life into otherwise plain and monotonous walls.
As we delve into the realm of decorative wall DIY, we will explore the techniques, materials, and creative ideas that can help you transform your walls into stunning focal points. From choosing the right colors and patterns to incorporating textures and unique elements, we will provide insights and tips to guide you through the process of creating captivating wall decor that reflects your personal style and taste.
Decorative wall DIY offers a myriad of creative possibilities to transform your walls. Here are 9 important things to consider:
- Choose a theme or style.
- Select appropriate materials.
- Prepare the wall surface.
- Use painter’s tape for clean lines.
- Apply multiple coats of paint.
- Incorporate textures and patterns.
- Add wall decals or stencils.
- Create 3D wall art.
- Hang decorative panels or mirrors.
With careful planning and execution, you can create stunning decorative wall art that reflects your personality and enhances the ambiance of your space.
Choose a theme or style.
Selecting a theme or style for your decorative wall DIY project is a crucial step that sets the tone and direction for your design. Consider the overall aesthetic of the room or space where the wall art will be displayed. Do you want a modern and minimalist look, a classic and elegant feel, or a whimsical and eclectic vibe? Once you have a general idea of the style you want to achieve, you can start narrowing down your options and choosing specific elements that align with that style.
For a modern and minimalist look, clean lines, geometric shapes, and neutral colors are often used. You could create a simple yet striking wall art piece using painter’s tape to create sharp lines and then painting the sections in contrasting colors. Alternatively, you could install a set of sleek and minimalist floating shelves to display small sculptures or other decorative objects.
If you prefer a classic and elegant style, consider incorporating elements such as damask patterns, floral motifs, or vintage-inspired designs. You could create a stunning wall art piece using stencils and paint to create a intricate pattern on the wall. Alternatively, you could hang a collection of framed family photos or vintage posters arranged in a symmetrical or grid-like pattern.
For a whimsical and eclectic style, let your creativity run wild and mix and match different colors, patterns, and textures. You could create a colorful and playful wall art piece using fabric scraps, yarn, and beads. Alternatively, you could hang a collection of mismatched frames, each containing a different photo, quote, or piece of artwork.
No matter what style you choose, the most important thing is to select elements that reflect your personal taste and style. Your decorative wall art should be a reflection of who you are and what you love.
Select appropriate materials.
Choosing the right materials for your decorative wall DIY project is essential for ensuring its success and durability. Consider factors such as the type of wall surface you’re working with, the desired outcome, and your budget.
- Paints and primers:
If you’re painting your wall, select high-quality paints and primers specifically designed for interior walls. Consider the finish you want, whether it’s matte, satin, or glossy. For best results, use a primer before painting to ensure the paint adheres properly and provides a smooth, even finish.
- Wallpapers and decals:
If you’re using wallpapers or decals, make sure they are suitable for the type of wall surface you have. Some wallpapers require special adhesives or primers, while others are self-adhesive. Decals are generally easy to apply and remove, making them a good option for temporary or seasonal decorations.
- Stencils:
If you’re creating stencils, choose a durable material like plastic or metal. Thicker stencils are less likely to flex or tear, giving you cleaner and more precise lines. You’ll also need to select the right type of paint or ink for your stenciling project.
- 3D wall art materials:
If you’re creating 3D wall art, the materials you choose will depend on the specific project. Common materials include wood, metal, fabric, paper, and clay. Consider the weight and size of your 3D wall art when selecting materials to ensure they can be securely attached to the wall.
In addition to the main materials for your wall art, you may also need additional items such as painter’s tape, brushes, rollers, adhesives, and hardware for hanging. Make sure you have all the necessary materials before starting your project to avoid delays or complications.
Prepare the wall surface.
Before you start applying your decorative wall art, it’s essential to prepare the wall surface properly. This will ensure that your wall art adheres properly and looks its best.
- Clean the wall:
Use a mild detergent and warm water to clean the wall surface. Remove any dirt, dust, grease, or other contaminants that may interfere with the adhesion of your wall art. Rinse the wall thoroughly and allow it to dry completely before proceeding.
- Repair any damage:
Inspect the wall surface for any cracks, holes, or other damage. Fill any holes or cracks with a spackling compound and allow it to dry according to the manufacturer’s instructions. Sand the repaired area until it is smooth and flush with the rest of the wall.
- Sand the wall:
Lightly sand the wall surface with fine-grit sandpaper to remove any imperfections and create a smooth, even surface. This will help the paint or adhesive adhere better to the wall.
- Apply a primer:
Using a paint roller or brush, apply a coat of primer to the wall surface. Primer helps the paint adhere better to the wall and provides a more even finish. Allow the primer to dry completely according to the manufacturer’s instructions.
Once you have prepared the wall surface properly, you can start applying your decorative wall art. By following these steps, you can ensure that your wall art will adhere properly and look its best for years to come.
Use painter’s tape for clean lines.
Painter’s tape is a versatile tool that can be used to create clean and crisp lines when painting walls. It is especially useful for creating geometric designs, stripes, and other patterns.
To use painter’s tape effectively, follow these steps:
- Choose the right tape.
There are different types of painter’s tape available, each designed for specific surfaces and applications. For most interior painting projects, a standard blue painter’s tape will suffice. However, if you are painting a delicate surface or a surface that is exposed to high heat or moisture, you may need to choose a specialized tape. - Prepare the wall surface.
Before applying painter’s tape, make sure the wall surface is clean, dry, and free of any dust or debris. This will ensure that the tape adheres properly and creates a clean line. - Apply the tape.
Start by applying the tape to the edge of the area you want to paint. Press the tape down firmly to ensure that it is securely adhered to the wall. If you are creating a pattern, use a level and a ruler to ensure that the tape is applied straight. - Paint the area.
Once the tape is applied, you can start painting the area. Use a brush or roller to apply the paint evenly and smoothly. Be careful not to paint over the tape, as this will create a messy line. - Remove the tape.
Once the paint is dry to the touch, carefully remove the painter’s tape. Pull the tape off slowly and at a 45-degree angle to avoid peeling off the paint.
By following these steps, you can use painter’s tape to create clean and crisp lines when painting walls. This technique is perfect for creating geometric designs, stripes, and other patterns.
Tips for using painter’s tape:
- Use a sharp utility knife to cut the tape.
- Apply the tape to a clean and dry surface.
- Press the tape down firmly to ensure that it is securely adhered to the wall.
- If you are creating a pattern, use a level and a ruler to ensure that the tape is applied straight.
- Be careful not to paint over the tape.
- Remove the tape slowly and at a 45-degree angle to avoid peeling off the paint.
Apply multiple coats of paint.
Applying multiple coats of paint is an essential step in any painting project, including decorative wall DIY. It ensures that the paint adheres properly to the wall surface, provides a smooth and even finish, and helps to achieve the desired color and opacity.
- Achieve full coverage and opacity:
A single coat of paint is often not enough to provide full coverage and opacity, especially if you are painting over a dark color or using a light-colored paint. Applying multiple coats allows you to build up the color and opacity gradually, resulting in a more vibrant and consistent finish.
- Eliminate brush strokes and lap marks:
Applying multiple coats of paint helps to eliminate brush strokes and lap marks, resulting in a smooth and even finish. Each coat fills in any gaps or imperfections left by the previous coat, creating a uniform and professional-looking surface.
- Enhance durability and longevity:
Applying multiple coats of paint increases the durability and longevity of the paint finish. Each coat adds a layer of protection to the wall surface, making it more resistant to wear, scratches, and fading. This is especially important in high-traffic areas or areas exposed to direct sunlight or moisture.
- Create depth and texture:
Applying multiple coats of paint can also be used to create depth and texture on your decorative wall art. By using different colors, finishes, or techniques, you can create a multi-dimensional effect that adds visual interest and character to your wall.
Tips for applying multiple coats of paint:
- Sand lightly between coats to smooth out any imperfections.
- Allow each coat to dry completely before applying the next.
- Apply thin, even coats to avoid runs and drips.
- Use a high-quality paint brush or roller for best results.
Incorporate textures and patterns.
Incorporating textures and patterns into your decorative wall DIY project can add depth, visual interest, and a unique touch to your wall art. Here are some ways to achieve this:
- Use textured paint:
Textured paint is a type of paint that contains small particles that create a textured finish when applied to a wall. You can choose from a variety of textured paints, including sand, stone, and wood finishes. Textured paint can be applied using a paint roller or brush, and it can be painted over with regular paint to create a unique and interesting effect.
- Create a textured background:
You can also create a textured background for your wall art using other materials such as fabric, wallpaper, or molding. For example, you could apply a layer of burlap or canvas to the wall and then paint over it to create a textured finish. Alternatively, you could use wallpaper with a textured design or install molding in a pattern to create a textured background.
- Add patterns using stencils:
Stencils are a great way to add patterns to your wall art. You can find stencils in a wide variety of designs, including geometric patterns, floral patterns, and animal prints. To use a stencil, simply place it on the wall and apply paint over it using a brush or roller. Once the paint is dry, remove the stencil to reveal the pattern.
- Create patterns using tape:
You can also use painter’s tape to create patterns on your wall. To do this, apply the tape to the wall in the desired pattern and then paint over it. Once the paint is dry, remove the tape to reveal the pattern. This technique is great for creating geometric patterns or stripes.
By incorporating textures and patterns into your decorative wall DIY project, you can create a unique and visually appealing wall art that reflects your personal style.
Add wall decals or stencils.
Wall decals and stencils are two popular and versatile options for adding patterns, designs, and artwork to your walls without the need for painting or extensive DIY skills.
Wall Decals:
Wall decals are pre-cut, self-adhesive designs that can be easily applied to walls, furniture, and other smooth surfaces. They come in a wide variety of designs, colors, and sizes, making them a great option for personalizing your space and adding a touch of style to any room. Wall decals are typically made from vinyl or fabric and are easy to apply and remove, making them a great option for temporary or seasonal decorations.
Benefits of using wall decals:
- Easy to apply and remove
- Wide variety of designs and colors
- Can be used on walls, furniture, and other smooth surfaces
- Affordable and cost-effective
- Great for temporary or seasonal decorations
Stencils:
Stencils are reusable templates that allow you to create your own designs and patterns on walls using paint. Stencils come in a variety of materials, including plastic, metal, and mylar, and can be used with a variety of paints, including latex, acrylic, and spray paint. To use a stencil, simply place it on the wall and apply paint over it using a brush or roller. Once the paint is dry, remove the stencil to reveal the design.
Benefits of using stencils:
- Reusable and can be used multiple times
- Allows you to create your own custom designs
- Can be used with a variety of paints and colors
- Great for creating intricate and detailed designs
Whether you choose to use wall decals or stencils, both options offer a simple and affordable way to add personality and style to your walls. With a little creativity and effort, you can create a unique and eye-catching wall art that reflects your personal taste and style.
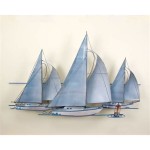
Create 3D wall art.
Creating 3D wall art is a fun and creative way to add depth and dimension to your walls. Whether you’re a seasoned DIYer or a beginner, there are many ways to create stunning 3D wall art pieces that will transform your space.
- Choose a theme or concept:
Before you start creating your 3D wall art, take some time to think about the theme or concept you want to convey. This could be anything from a natural landscape to an abstract design. Once you have a general idea in mind, you can start gathering materials and planning your design.
- Select appropriate materials:
The materials you choose for your 3D wall art will depend on the specific design you have in mind. Some common materials used for 3D wall art include wood, metal, fabric, paper, and clay. You can also use found objects or recycled materials to create a unique and personalized piece.
- Prepare your wall:
Before you start applying your 3D wall art, it’s important to prepare the wall surface. This may involve cleaning the wall, repairing any damage, and applying a primer. By properly preparing the wall, you will ensure that your 3D wall art adheres properly and looks its best.
- Attach your 3D wall art:
Once your 3D wall art is ready, you can start attaching it to the wall. The method you use to attach your wall art will depend on the materials you are using and the weight of the piece. Some common methods include using nails, screws, adhesive, or a combination of these methods.
With a little creativity and effort, you can create stunning 3D wall art that will add personality and style to your space. Whether you choose to create a simple geometric design or a complex and intricate piece, the possibilities are endless.
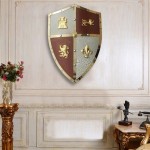
Hang decorative panels or mirrors.
Hanging decorative panels or mirrors on your walls is a simple yet effective way to add style and personality to your space. These decorative elements can be used to create a focal point, add texture and dimension, or simply reflect light and brighten up a room.
- Create a focal point:
A large, eye-catching decorative panel or mirror can be used to create a focal point in any room. Hang it above a fireplace, sofa, or bed to draw attention to the area and create a sense of balance and symmetry.
- Add texture and dimension:
Decorative panels and mirrors come in a variety of materials, finishes, and textures. By hanging panels or mirrors with different textures and finishes, you can add depth and dimension to your walls, creating a more visually interesting and dynamic space.
- Reflect light and brighten up a room:
Mirrors have the ability to reflect light and make a room feel larger and brighter. Hang a mirror opposite a window to reflect natural light and make the room feel more spacious. You can also use mirrors to reflect artificial light from lamps and fixtures, creating a warm and inviting ambiance.
- Add a personal touch:
Decorative panels and mirrors can be used to add a personal touch to your space. Choose panels or mirrors that reflect your personal style and taste. You can also use mirrors to display family photos, artwork, or other meaningful objects.
When hanging decorative panels or mirrors, consider the following tips:
- Choose the right size and scale:
The size and scale of the decorative panel or mirror should be appropriate for the size of the wall and the room. A large panel or mirror can overwhelm a small wall, while a small panel or mirror may get lost on a large wall.
- Hang it at the right height:
The height at which you hang the decorative panel or mirror will depend on the specific piece and the desired effect. Generally speaking, panels and mirrors should be hung at eye level or slightly above eye level.
- Use the right hardware:
Make sure to use the appropriate hardware for hanging your decorative panel or mirror. The type of hardware you need will depend on the weight of the piece and the type of wall you are hanging it on.


Related Posts